| Bite Here, Enjoy! | 12:03 AM -- Wed October 5, 2011 |
I know it seems like it's nothing but contests around here all of a sudden, but that's because these contests where you do something creative need to give you time, so I have to launch them all at the start of the month! This latest one is simple enough: Invent a Halloween recipe, and share it with us!
Here's what I created myself, with some amazing inspiration today when I realized I should probably demonstrate with my own recipe...
CANDY CORN ON THE COB


Like it? Isn't it awesome? Here's a rough recipe to make it yourself...
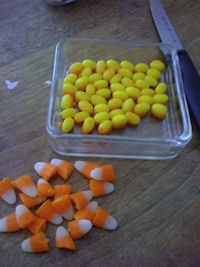 | Just cut off the yellow ends from a whole lot of candy corn. Keep a little orange on there, whatever it takes to make a nice consistent kernel size. |
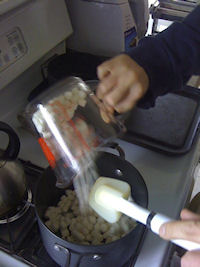 | The next step is to make Rice Krispie Treats! I'm not gonna give you the recipe, because if you have a box of Krispies (or a generic equivalent), I am quite sure the recipe is right on there. One thing I would suggest, because it was a problem for me, is to go heavier than normal on the marshmallows. You want a fairly sticky krispie treat, not a dry one. |
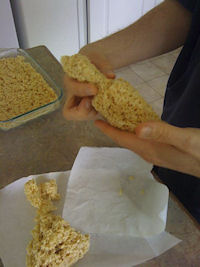 | I can't give exact measurements here, but each cob you want to make should use maybe a cup and a half of krispie treat. It really depends on how big you want to make the corn! As you can see in the picture, I made two, and let the rest become good old fashioned treats. Now shape each cob. You can use a piece of waxed paper to keep from getting sticky hands. I found it was really not very sticky for me, but that caused me problems in the next phase, so again, make sticky treats! Shape the cob into a general corn shape. You can see that I made the top half skinnier than the bottom. This is because the kernels will stick out further, and the lower half is not going to have kernels. I'd actually recommend you don't do this - I discovered that pushing the kernels into the rice squeezed it together quite a bit, so if I had just made a sort of long football shape (like real corn!), that would've done the job. |
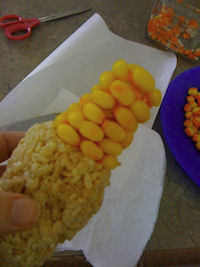 | Next, push the kernels of candy corn into the top half of each cob! Here is why you wanted a sticky krispie treat. Mine was so dry that the candy corn kept falling off. |
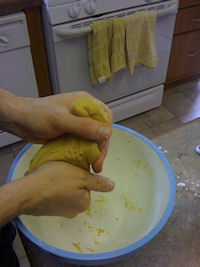 |
The last part of the recipe is the most chef-ly and was new to me! I made fondant, following this recipe. It turns out to be very easy to make! We didn't have corn syrup, which I substituted a mix of honey and molasses for (you can taste that in the end result, for sure), and much too late I discovered that our blue food coloring had dried up, so you get this stylish dried-corn appearance instead of the green I had intended. Oh, and I substituted butter for shortening, but I always do that. Once the fondant was kneaded, I rolled it out on a piece of waxed paper (the same one as before, because I'm cheap), and didn't even need to 'flour' the surface with sugar, because it didn't stick at all. I really have to repeat that I found fondant super easy to make and to roll out. You can see in the final picture that, much like the krispies, I ended up making it too dry though, and it cracked and broke a lot. |
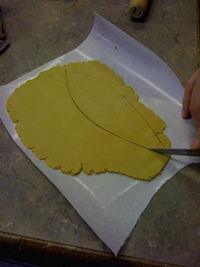 | So I cut it into some sort of leaf shapes, wrapped them around the lower half of the cob (see why you didn't need kernels down there? Good thing too - krispie treats are much tastier than candy corn), and curled them down at the top like an open corn cob. Then for good measure, I used a knife to etch lines in the fondant. That added a nice corn texture. That's it! |
Is it tasty? Not really. It's much too sweet. But I got to eat a lot of krispie treats, and it looks really cool. Now that you've seen mine, go make your own Halloween recipe!
| 3 comments | Back to top! |
Copyright 2021-2025, Hamumu Games Inc.

